Drawing Realistically with Angles: The Dot-to-Dot Secret for Perfect Proportions
Lightly Sketching the Largest Shapes: Connecting Dots with Straight Lines
Why Key Points and "Dots" Help Create Realistic Outlines
- Importance of identifying key points on objects
- Simplicity in initial sketches
- Techniques for accurately replicating angles
- Finding relationships between different objects
- Benefits of drawing with angles for accuracy
- Concept of viewing objects as dot-to-dot drawings
- Importance of identifying key points on objects
- Identifying and placing “dots”
- Locations: high points, low points, and prominent features
- Lightly Sketching the Largest Shapes
- Connecting the dots with straight lines
- Importance of simplicity in initial sketches
- Techniques for accurately with oblique lines
- Using a pencil as a visual tool
- Drawing straight lines based on observed angles
- Developing the Inside Forms
- Observing and sketching shadow shapes
- Placing dots along significant points of shadow shapes
- Replicating angles
- Finding relationships between different objects
- Importance of crossing lines for final drawing composition
- Maintaining Proportion and Realism
- Common pitfalls of drawing one object at a time
- Benefits of drawing with angles for accuracy
- Emphasis on proportion and placement within the composition
The Childhood Dot-to-Dot Secret That Transforms Realistic Drawing
I’m going to share a quick drawing secret with you. It requires a trip down memory lane to our childhood. This is one of the best secrets I ever learned for drawing realistically.
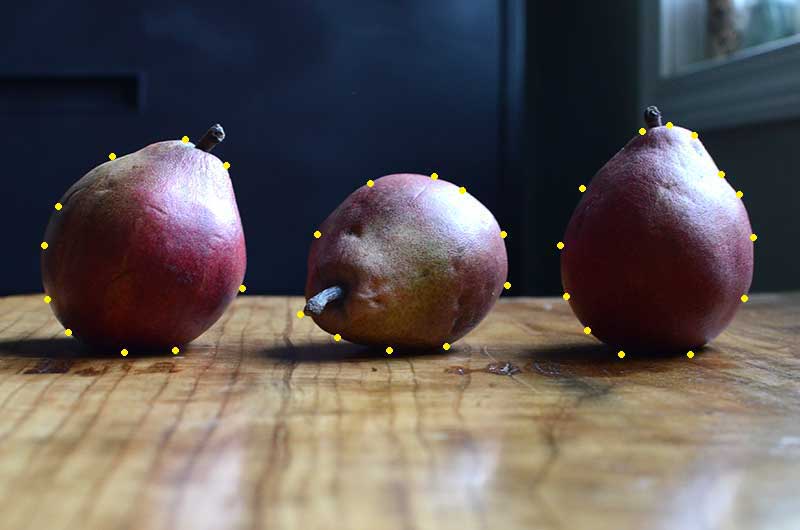
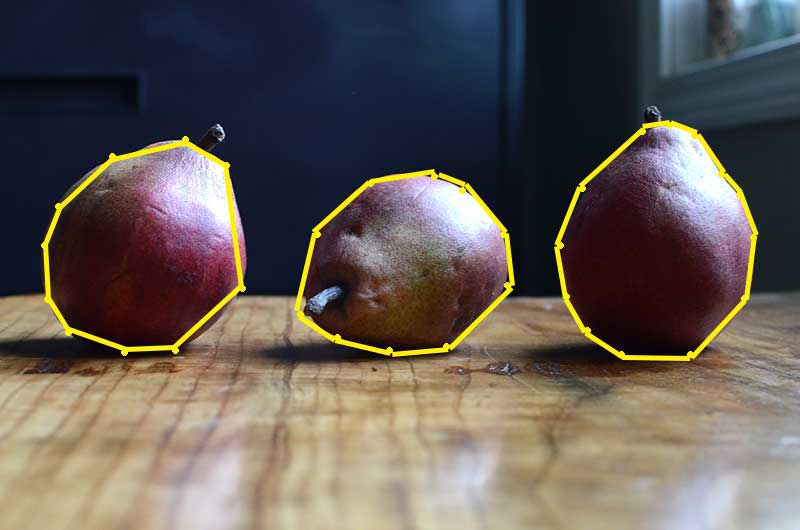
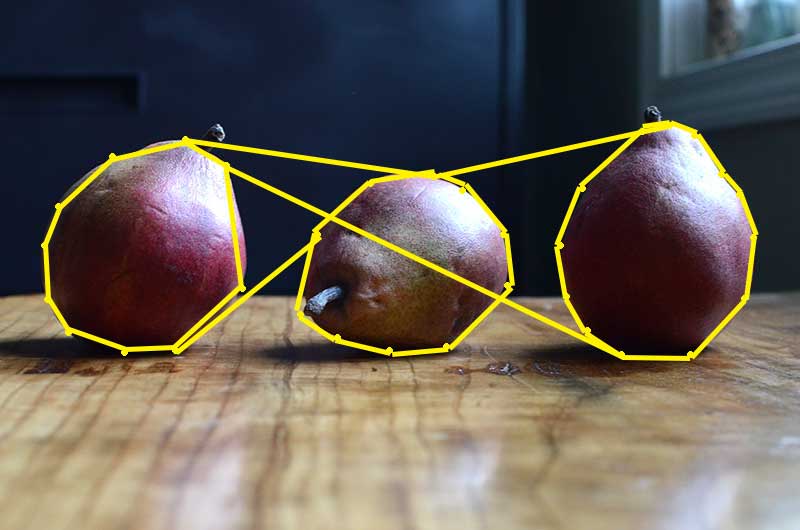
Do you remember doing dot-to-dot drawings? Each object was outlined with dots, and there was joy in watching the objects appear once the dots were connected with a series of short, straight lines. We'll begin this method by treating each object as a dot-to-dot.
Step 1: Set Up a Simple Still Life & Visualize Dot-to-Dot
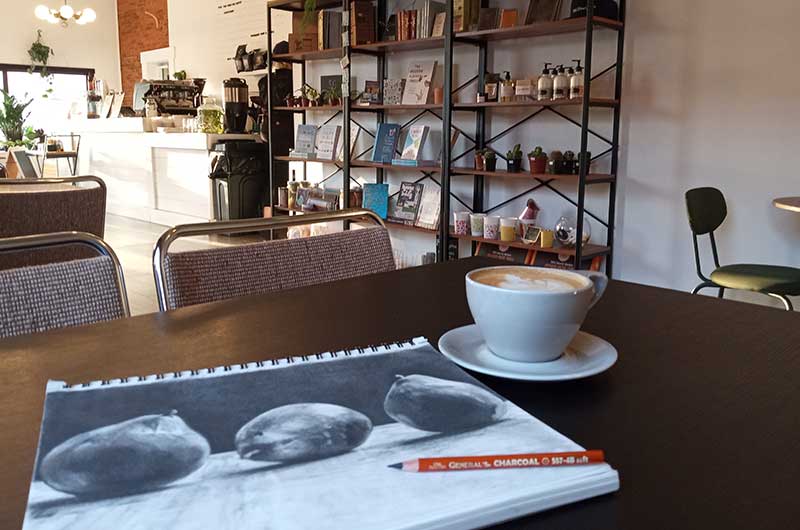
Let’s get started! First, set up a still life with a few simple objects. I'm using pears for this demonstration.
Step 2: Place Key Dots – High, Low, Wide, Narrow & Prominent Points
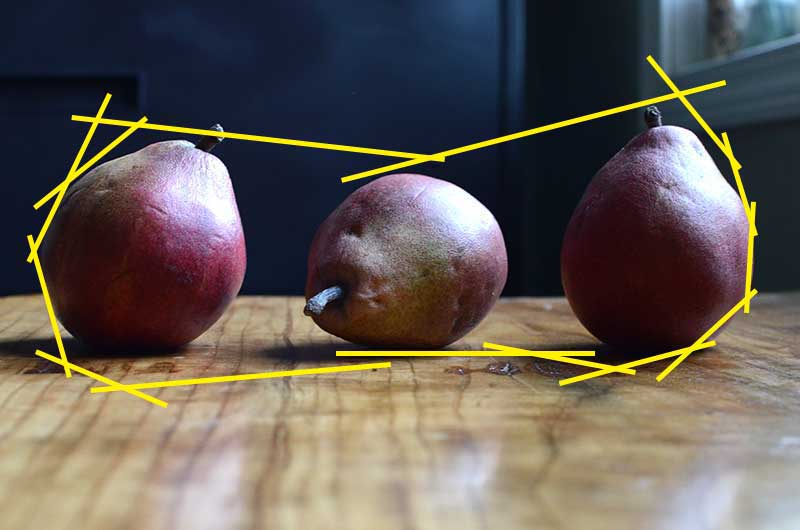
To draw with realism using angles, visualize each object as a dot-to-dot drawing for a moment.Place dots only on the highest points, lowest points, widest points, narrowest points, and most prominent features of the objects. These dots act like coordinates on a map. We will use them to map out the size and placement of each object as we draw.
Step 3: Connect Dots with Straight Lines – Use Pencil Sighting for Angles
Lightly sketch the largest shapes by connecting the dots with straight lines. Keep it simple; the goal is to replicate each angle as accurately as possible. To achieve this, hold a pencil up in front of your subject and tilt it until it aligns perfectly with the slant or angle between two points. Then, move to your paper and draw a straight oblique or slanted line. Draw slowly and carefully.
Step 4: Map Inside Forms & Shadow Shapes with More Dots & Angles
Map out the angles as you move across the forms. This method will help you draw the correct size and position the objects accurately in relation to one another.
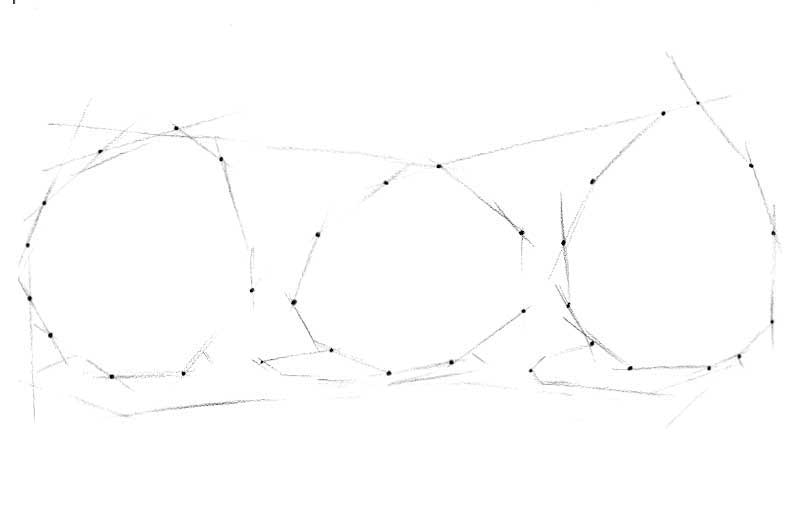
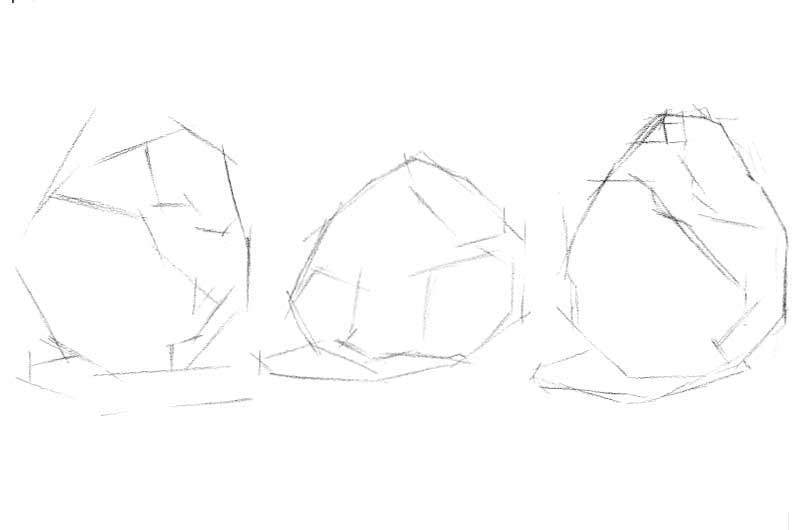
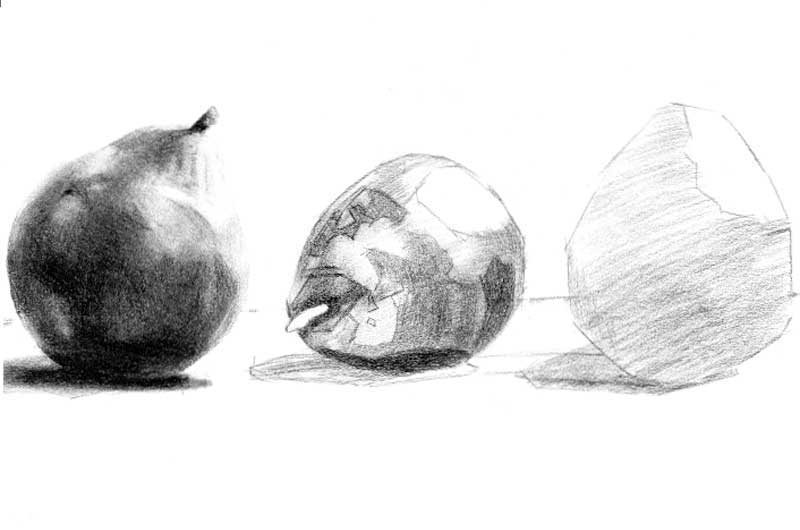
Next, focus on the inside of the forms. Relax your gaze and observe the shapes of the shadows. Imagine placing dots along the highest, lowest, widest, and narrowest points of these shadow shapes. Carefully replicate these angles in your drawing. Identify a point on one object and find the angle to a prominent point on another object. Carefully replicate these angles one by one.
Step 5: Extend Angles Across Objects for Relational Accuracy
Extend the lines across your composition as needed. Don’t worry about creating too many lines; they will blend into the final drawing and become inconspicuous. Consistently working point to point and creating angles that connect different objects will help develop the overall composition as a whole versus one object at a time.
Why Drawing One Object at a Time Causes Distortion (And How Angles Fix It)
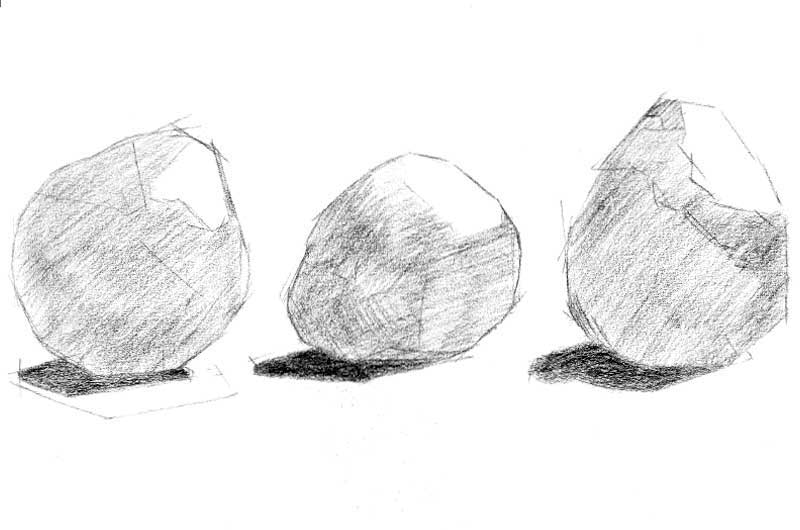
Often, we tend to draw one item at a time, which can lead to objects being placed too far apart or drawing the wrong size, resulting in distortion. Drawing with angles helps to maintain proportion and keeps the drawing realistic.
Remember, realism in art is about creating a copy of what we see, an accurate representation of reality.
- Draw each object at the correct size
- Shade it with the appropriate values
- Replicate the angles as precisely as possible
- Everything needs to be in the right place
The Science Behind Angle Sighting & Pencil Triangulation
From a perceptual psychology perspective, this angle-based approach directly counters common visual illusions and biases that plague realistic drawing. Research shows that beginners and non-artists often misperceive angles. Our brains tend to "correct" slanted lines to appear more horizontal or vertical based on assumptions about object orientation—leading to distorted proportions. By using pencil sighting to objectively measure and replicate angles (a form of triangulation), you bypass these shortcuts, training your visual system to draw things as you see them, closer to how they truly appear on the retina. This method aligns with evidence from studies on observational drawing accuracy. It's a science-inspired hack for bridging the gap between what we see and what we draw.
Conclusion: Draw What You See – Accurate, Proportionate, Realistic Results
Drawing with angles is similar to the triangulation technique. If you want to explore this method further, I encourage you to look up triangulation in drawing. I hope you find this approach helpful!
I'm rooting for you!
Related Topics: