How To Begin A Portrait In Oil
Use This Proven Approach for Depth, Luminosity, and Longevity in Your Paintings.
Achieve Greater Control and Realism For Vibrant, Timeless Portraits.
- Prepare a canvas or painting panel
- Draw the composition
- Create an underpainting
- Apply color
- Refine as you paint in layers
Preparing Your Surface for Oil Portrait Painting
The first step in beginning a portrait in oil is to prepare a canvas or painting panel. The canvas or panel should be primed with several layers of gesso. Gesso is a sealer and primer that prepares the surface to properly accept paint. Gesso is available in acrylic or oil-based formulas. Read the label and follow the manufacturer's instructions when preparing your painting surface. A convenient option is to purchase pre-primed canvas or panels from your art supply store.
Drawing the Composition on Your Canvas
Once the surface is prepared, the next step is to draw the composition onto the surface. The portrait is typically drawn with one color of paint thinned slightly with a solvent like turpentine or mineral spirits. Another option is to draw the composition with charcoal or other drawing mediums. Remember to test the drawing medium to be sure that it won't resist the paint or show through the finished paint layers. Linseed oil becomes transparent over time, so the drawing may eventually be visible through the paint layers.
Video Demonstration: See It in Action
Creating a Strong Underpainting (Grisaille or Monochrome)
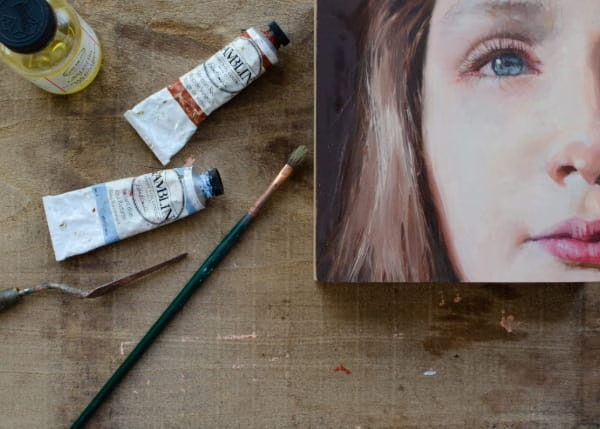
The first layer of an oil painting is often called an underpainting. The underpainting is typically painted with one color paint, usually brown or green, thinned slightly with turpentine or odorless mineral spirits. I prefer to use a product called Gamsol. I dip the tip of my brush into Gamsol, then work the Gamsol into the paint on my palette, thinning it slightly. Thinning the paint makes it easier to manipulate. Dab the brush on a clean lint-free rag to remove most of the paint, leaving just enough to draw with. Draw the portrait, starting with the largest shapes first. Then break the large shapes into smaller shapes. Draw out the shadow shapes. Shade the shadow shapes and blend the mid-tones as necessary to create an underpainting that sets the lights and darks. The underpainting can be painted as loosely or as refined as you like. Let this layer dry fully before applying the next paint layer. Letting the underpainting dry prevents the brown paint from affecting the color in the next layer.
Applying the First Layer of Color: Blocking In Skin Tones
Begin the second layer of your oil portrait by applying skin-tone paint colors in broad, flat areas. I like to mix a skin tone base color using a combination of Venetian Red and Raw Sienna. I lighten this base color with white to create several flesh-tone tints or shades.
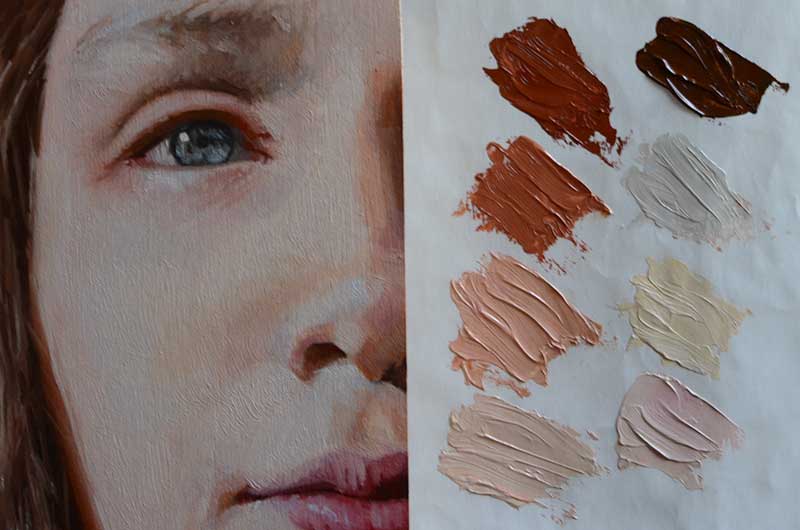
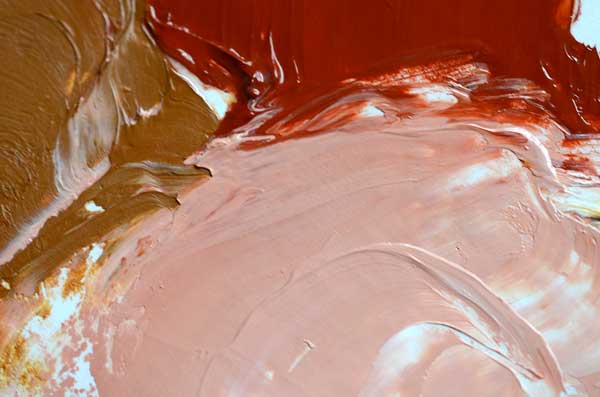
I typically mix 3 or 4 skin-tone shades in addition to the base color. Blue and yellow can be added to adjust the color temperature and reds can be added to create pinkish skin tones. Match the color as closely as possible but avoid blending or painting details at this stage. Let this second layer dry fully before applying the next layer. Paint can be thinned slightly with an oil like linseed oil or a painting medium. Remember to use the oil sparingly. Some artists prefer to paint many transparent paint layers, while others prefer to paint thicker opaque layers. Either way is fine. Remember to follow the fat over lean rule when oil painting.
Video Demonstration: See It in Action
Paint in Layers: Follow the Fat-Over-Lean Rule
Following the fat over lean rule when painting in oil can prevent cracking and other paint defects.
Painting in Layers: Mastering the Fat-Over-Lean Rule
The rule goes like this. Use a solvent to thin your first layer of paint. A solvent makes the layer "lean". "Fat" in this rule refers to "oil". The more oil that is added and mixed into the paint, the "fatter" the paint layer gets. You want your "fastest" layers to be applied last. Oil paint is pigment mixed with oil, so there's already oil in the paint that you squeeze out of the tube. By mixing a solvent with the first layer, you are breaking down a bit of that oil, making the first layer "lean". The paint in the second layer is thinned with a small amount of linseed oil or paint medium. Adding extra oil makes it a "fat" layer. So we only want to add a little to the second layer. We can add a little bit more oil with each layer. We want the top and final layer to contain the most added oil. Glazes should be done in the last layer because you make a transparent glaze by adding more oil to the paint. Why do we care? Why do we need to paint fat over lean? Because extra oil added to the paint makes that paint layer flexible. When you add solvent to paint, the paint will dry more brittle. If you paint a brittle layer on top of a flexible layer, the brittle layer is prone to cracking. So we paint "fat" over "lean" to prevent cracking. This sounds more complex than it is. Remember this. Thin your first paint layer with solvent. Only glaze the final layer of a finished oil painting. If you keep the amount of oil pretty consistent in the other layers, you should be fine.
Refining the Portrait: Building Depth and Luminosity
Some artists prefer to apply many transparent layers, building up color very slowly. Others prefer to paint in thicker layers of opaque paint. Either way is fine. In my experience, the more layers, the more depth the painting seems to have. Remember that light travels through your painting, bounces off of the ground or painting surface, and back out of the painting. So more layers may increase the luminosity. Most importantly, let each layer dry before applying the next. Paint that is dry to the touch may still be wet underneath the surface, therefore easier to disturb or affect the paint with the next layer.
Video Demonstration: See It in Action
The Chemistry & Optics of Layered Oil Portrait Painting
Linseed oil slowly autoxidizes to create a flexible yet durable paint film. Applying thin layers helps them dry faster due to better access to oxygen. Following the fat-over-lean rule ensures dimensional stability: the initial lean layers, which are solvent-thinned, dry and become brittle, while the later fat layers, containing more oil, remain flexible. This layering technique prevents cracking in the upper layers as the painting ages.
Using a white gesso ground maximizes luminosity, as high albedo reflects light through the transparent paint layers, resulting in a glowing effect. Grisaille underpainting establishes a structure of shapes and values first. Research suggests that our visual system processes value before hue, so starting with a strong monochromatic base can aid in accurate color placement. Broad initial color blocks facilitate perceptual adjustments, while subtle temperature adjustments, like using blue for cool shadows and yellow or red for warm areas, mimic the natural chromatic variations of skin under different lighting.
To maintain the integrity of the paint film, it's important to use minimal oil. Excess oil can slow drying and lead to tackiness and cracking. Proper curing creates a stable paint film that is less susceptible to environmental damage. Methodical layering techniques contribute to convincing three-dimensionality and lifelike flesh tones in the artwork.
Conclusion: Patience and Layers Lead to Realistic Portraits
Related Topics: