Pencil Drawing Tips for Realism: Sharpening, Hardness, Paper, and Shading Techniques
Why Super-Sharp Pencils and Fresh Blades Matter for Control and Precision
Extend Your Pencils: The Benefits of Pencil Extenders for Heavy-Handed Artists
- Keep Drawing Pencils Sharp
- Use A Pencil Extender
- Understanding Pencil Hardness Levels
- Wrap Strokes Around The Form
- Selecting The Right Paper For Pencil Drawing
- Drawing On Toned Paper
- Learn How To Gesso Paper
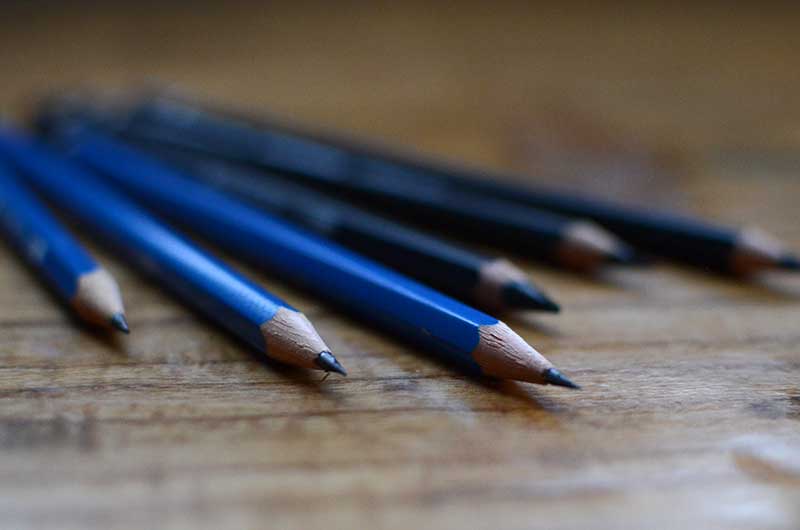
Keep Your Drawing Pencils Super-Sharp for Precision and Control
I'm not kidding. While it may seem trivial, super-sharp pencils offer better control, make lighter marks, and are better when building up layers.
Did you know that you can buy blades for those little pencil sharpeners? Buy a pack of blades. Change the blade when pencil leads start breaking off in the sharpener during sharpening. Just unscrew the small screw that holds the blade. Replace the blade, insert the screw, and tighten. You'll be amazed at how long this extends the life of the pencil sharpener and improves the pencil point.
Some artists shave away an inch or so of pencil, revealing a lengthy and sharp lead.
Use a Pencil Extender: Better Grip and Lighter Marks for Heavy Hands
A pencil extender fits onto the eraser end of a pencil, extending the length of the pencil overall. The extender can become a handle when pencils become short and difficult to use. Using a pencil extender makes the pencil longer. A longer pencil helps to make lighter marks. I have a heavy hand. Having a heavy hand means you tend to draw too dark, pressing too hard with the pencil. Using a pencil extender and super-sharp pencils can offer better control for heavy-handed artists.
Don't Drop Your Pencils: Preventing Internal Lead Breaks
Don't drop your pencils. Seriously! Dropping art pencils breaks the lead inside of the pencils. Ever wonder why the pencil keeps breaking off to a flat lead when sharpening? The sharpener likely needs a new blade, or the lead inside the wooden pencil casing is broken. Try not to drop your pencils.
Understanding Pencil Hardness: H to B Grades for Layering & Shading
Art pencils are available in a variety of materials and hardness levels. The variety of pencils available includes charcoal drawing pencils, graphite drawing pencils, carbon drawing pencils, colored pencils, and more.
The hardness level of the lead within the pencil determines how hard or soft the lead is. A hard pencil lead tends to make lighter marks. Hard pencils are great for starting a drawing. They can be sharpened to a very sharp point, make lighter marks, and tend to make thinner lines.
A soft pencil lead easily blends, making it great for shading. Soft pencil lead tends to make darker marks. A soft pencil point wears down quickly, so you may need to sharpen a soft pencil more often.
Buy a variety of pencils in every hardness level. Experiment with each until you become familiar. Develop a working method. For example, start a drawing with the hardest pencil, establishing the overall shape and proportions. Map out the shadow shapes with a medium pencil. Consider crosshatching with a hard to medium pencil. Shade shadow shapes with a softer pencil to allow for blending. Softly blend the mid-tones where light areas meet darker areas of the drawing.
Wrap Pencil Strokes Around the Form to Create Convincing 3D Illusion
The eye tends to follow lines. Each pencil stroke is like a very subtle line. It's possible to create the illusion of a 3D form by wrapping pencil strokes around forms. Shade around the form. Shading a curved form can be accomplished with pencil strokes that follow the form. As pencil strokes following the form create illusions of depth, pencil strokes that defy the natural shapes of the form can detract or flatten a form.
If interested in shading with lines, consider studying crosshatching techniques and the like.
Selecting the Right Paper: Tooth, Texture, and Acid-Free Quality
Seriously, the paper type, texture, color, and tooth will affect the quality and outcome of your pencil drawing.
Paper tooth describes the overall texture of the paper. Tooth or texture forms little dips that grab and hold onto the drawing medium. A roughly textured paper will grab or scrape bits of charcoal as your pencil rubs across the paper's surface. The tiny dips in the paper give the charcoal a place to rest. Notice how charcoal tends to dust right off of smooth paper.
Drawing on too smooth of paper makes it hard to build up layers, especially with charcoal, as it tends to dust off. The tooth helps the medium stay on the paper.
Making it hard to define details, heavily textured paper may be too rough. Aim for something in the middle. Experiment with different drawing papers until you find what works for you.
Choose a good quality acid-free drawing paper. Acid-free means that the drawing is less likely to yellow over time.
Drawing on Toned Paper: Built-In Mid-Tones for Faster Realism
Toned drawing paper is colored. Many different colors of toned paper are available. Drawing on toned paper can save time when shading. The paper color can serve as a mid-tone.
When drawing on white paper, we tend to leave the white paper exposed and untouched in the brightest areas. The white paper is left blank in the highlight areas. With toned paper, the exposed paper can serve as the mid-tones.
Shading provides the darks and shadows, while highlights are added with white chalk or white pencils. When using white chalk pencils, don't blend the white with charcoal or the darks. Blending the two looks muddy. When using white chalk, aim to keep the white areas separated from the dark sections, allowing the toned paper to bridge the gap.
Quick Checks and Corrections: Mirrors, Photos, and Proportion Measuring
Drawing with pencils is similar to other types of drawing. Check your drawing often. Measure and double-check proportions as you go. Take a photo of the drawing or check it in a mirror to see if the darks are too dark or the lights are too light. Check often and correct as you draw.
Learn How to Gesso Paper for a Custom, Durable Surface
Gesso can be applied to stretched paper. Gesso created a tough drawing surface that can easily handle erasing. Color can be mixed into the gesso to tone the paper.
Pencil Drawing Ideas to Practice Realism
Here are some ideas for pencil drawing realistic:
- Soda Can Pencil Drawing
- Portrait Drawing With Pencils
- Glass Jars & Reflective Objects
- Pencil Drawing Apples & Fruit
- Pencil Drawing Nature Scenery
- Landscapes & Trees
- Pencil Drawing Mountains
- Pencil Drawing Animals
- Pencil Drawing Guitars & Other Instruments
- Anatomy & The Human Body
The Motor and Perceptual Science Behind These Pencil Drawing Techniques
These pencil techniques leverage fine motor control and more to improve realism. Super-sharp points and extenders reduce pressure variability. Longer tools increase leverage. A longer pencil may also minimize hand strain and promote lighter strokes. Research on grip force shows extended handles counter heavy-handed tendencies by shifting control from fingers to arm, reducing over-pressurization that darkens marks unintentionally. Wrapping strokes around forms aligns with how the brain uses directional texture to infer curvature and depth. Following surface contours reinforces 3D shape perception, while contradictory strokes flatten. Look up gestalt interference. Paper tooth enhances adhesion through micro-mechanical interlocking. Textured surfaces increase friction and pigment entrapment, allowing layered buildup without dusting off (especially charcoal). Toned paper shortcuts value perception by providing a neutral mid-tone anchor which may reduce cognitive load in relative luminance judgments. Studies of portrait drawing accuracy show that prioritizing relational value shapes over linework significantly reduces errors in likeness, as it aligns more closely with how the brain reconstructs facial form from light patterns rather than categorical features (Cohen & Jones, 2008). Gessoed paper adds durability via polymer reinforcement, resisting erasing damage and enabling aggressive reworking—overall, these methods may help to bridge what the eye sees with what the hand records for convincing, lifelike pencil work.
References
Cohen, D. J., & Jones, H. E. (2008). How shape constancy relates to drawing accuracy. Psychology of Aesthetics, Creativity, and the Arts, 2(1), 8–19. https://doi.org/10.1037/1931-3896.2.1.8
Full PDF available: https://people.uncw.edu/cohend/research/papers/cohen%20and%20jones%20-%20aca-2-1-8.pdf (author-provided open access copy)
Studies of portrait drawing accuracy show that prioritizing relational value shapes over linework significantly reduces errors in likeness, as it aligns more closely with how the brain reconstructs facial form from light patterns rather than categorical features Chamberland et al., 2016.
Full PDF available: https://www.researchgate.net/publication/305722035_Outlining_face_processing_skills_of_portrait_artists_Perceptual_experience_with_faces_predicts_performance(Outlining face processing skills of portrait artists: Perceptual experience with faces predicts performance)
Conclusion: Build Better Habits for Lifelike Pencil Work
Related Topics:
Drawing With Angles
Shading A Drawing
Sighting Angles
How To Hold A Pencil
Drawing 3D